
Installing your own luxury vinyl plank (LVP) flooring can feel like a huge project—but it’s one that can save you a lot of money and give you a serious sense of pride once you see the finished result. Picture tossing out that old carpet or chipped-up tile and walking across a brand-new floor that you installed yourself. But how exactly do you get started, and what should you watch out for along the way?
Installing luxury vinyl plank flooring starts with making sure your subfloor is clean and level. You’ll need basic tools like a measuring tape, utility knife, and spacers. Then, depending on the product, you’ll click or glue the planks in place. With proper planning and a little patience, most DIYers can achieve professional-looking floors at a fraction of the cost.
There’s no need to feel overwhelmed. In the sections below, we’ll walk through the entire process—from understanding what LVP actually is, to deciding whether you can handle the job yourself, and finally laying down each plank like a pro. By the end of this guide, you’ll have the know-how (and hopefully the confidence!) to transform your space on your own.
I. Introduction: What Is Luxury Vinyl Plank (LVP) Flooring?
Luxury vinyl plank (LVP) is a multi-layered flooring option that looks like real wood or stone, yet offers water resistance and durability at an affordable price.
Understanding LVP from Different Angles
- Composition and Durability
- LVP is usually made up of four main layers: the wear layer, the design or print layer, a vinyl core layer, and sometimes an attached underlayment.
- This layered construction makes it more resilient against scratches, moisture, and everyday wear and tear compared to traditional laminate or hardwood.
- Realistic Appearance
- Advanced printing techniques give LVP planks a highly realistic wood grain or stone-like texture.
- You can often choose from a wide range of finishes—rustic oak, sleek maple, or even marble patterns—so there’s likely a design to match any décor.
- Cost-Effectiveness
- Although it varies by brand and region, installing LVP often costs significantly less than hardwood.
- According to various home improvement surveys, you can pay anywhere from $2 to $5 per square foot for LVP (material only), while hardwood can easily run $5 to $10 (or more) per square foot.
- Installation Flexibility
- Many LVP products feature a user-friendly click-lock mechanism, making them easier for DIYers to install.
- Some others use a glue-down approach, which might be better for commercial settings or areas with heavy traffic.
- Popularity in Modern Homes
- LVP is incredibly versatile and suits bathrooms, kitchens, living rooms, basements, and more.
- Because it’s water-resistant, it’s especially appealing for families with children or pets.
If you’re looking for a floor that provides a stylish finish, is tough against daily scuffs, and won’t break the bank, LVP is a strong contender. It’s basically the sweet spot between high-end appeal and practical performance.
II. Can I Install a Luxury Vinyl Plank Myself?
Yes. With the right tools, careful prep, and a willingness to learn, most DIYers can successfully install luxury vinyl plank flooring.
Evaluating DIY vs. Professional Installation
- Skill Level Assessment
- DIY-Friendly: If you’ve handled simpler home projects—like painting walls or putting together shelves—you’re already building the skills you need. Most LVP systems are user-friendly and forgiving for small errors.
- Complex Layouts: If your room has a lot of nooks, crannies, or tricky angles, you’ll need to plan your cuts and layout carefully. This adds complexity, but it’s still doable if you’re patient.
- Time Commitment
- Project Length: A first-time DIYer might need a weekend to tackle a standard 12×12 room, accounting for breaks, mistakes, and subfloor prep.
- Working in Sections: If you can’t dedicate an entire weekend, it’s okay to install in sections, as long as you properly secure the flooring you’ve already laid.
- Cost Savings
- Labor Costs: Professional installation can range from $2 to $4 per square foot or more, depending on your location and the complexity of the job. Doing it yourself means that money stays in your pocket.
- Mistakes Happen: On the flip side, mistakes like cutting planks incorrectly could lead to buying extra materials, which cuts into your savings.
- Sense of Accomplishment
- DIY Pride: There’s something incredibly rewarding about telling friends and family, “I installed these floors myself!”
- Learning Experience: Even if you run into hurdles, those mistakes become lessons that make you a better DIYer in the long run.
- When to Hire Pros
- Big Commercial Spaces: If you’re covering a massive area or working under strict deadlines, a pro might be the more efficient route.
- Structural Concerns: If you discover major subfloor damage or suspect a structural issue, it’s best to consult a professional.
So, can you handle LVP installation yourself? Absolutely, in most cases. It’s a relatively approachable project, especially compared to traditional hardwood installs. Just make sure you’re ready to invest the necessary time for careful prep and thorough research.
III. Which Tools and Materials Do I Need for a Successful DIY Installation?
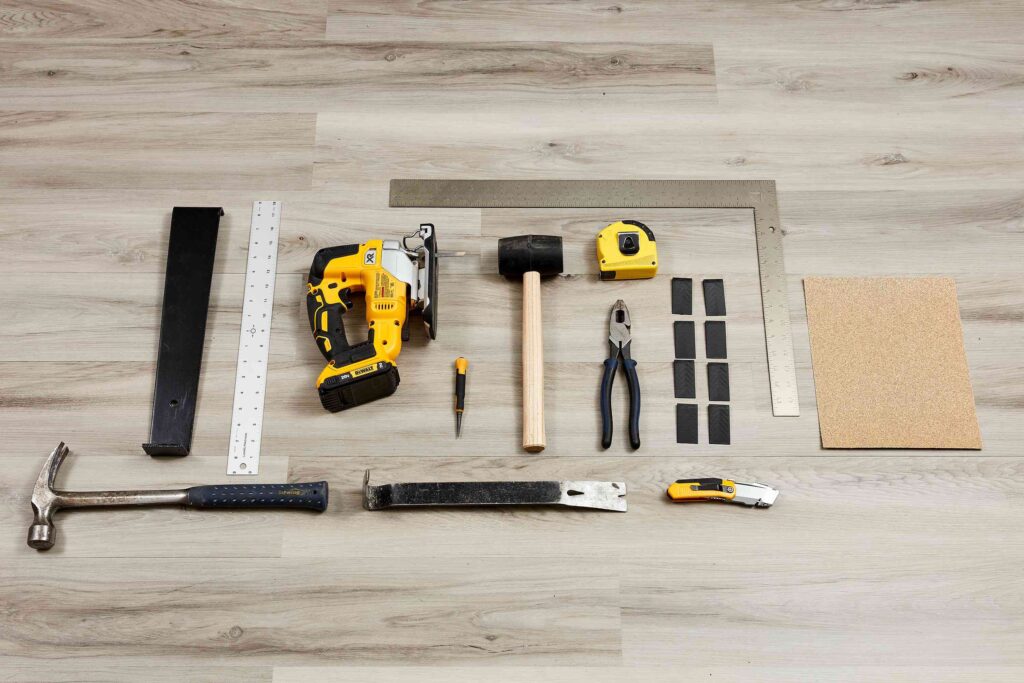
Gather a measuring tape, pencil, utility knife, spacers, tapping block, pull bar, underlayment (if needed), and enough LVP planks plus a 10% surplus to ensure a smooth installation.
Essential Items and Why They Matter
- Measuring and Marking Tools
- Measuring Tape: You’ll be measuring floor dimensions and marking cut lines on the planks. Accuracy is crucial.
- Pencil or Chalk: Great for marking out the areas you need to cut. Pencil marks can be wiped off easily.
- Cutting and Fitting Tools
- Utility Knife: Most LVP can be cut by scoring and snapping. Keep extra blades on hand; dull blades cause jagged edges.
- Jigsaw or Circular Saw: These come in handy for thick planks or awkward angles around vents or door frames.
- Installation Aids
- Spacers: Help maintain an expansion gap—usually around 1/4 inch—near walls or fixed objects.
- Tapping Block and Pull Bar: Let you snug the planks together without damaging the edges or click system.
- Underlayment (If Needed)
- Sound Dampening: If you’re installing over a subfloor that amplifies noise, a layer of underlayment can reduce footstep sounds.
- Moisture Barrier: For installations over concrete or in damp areas, look for an underlayment that also acts as a moisture barrier.
- Safety Equipment
- Knee Pads: Since you’ll be crouching or kneeling, protect your knees.
- Gloves and Goggles: Especially important if you’re using power tools.
- LVP Planks
- Buy Extra: It’s smart to get about 10% more than your floor’s square footage to accommodate cutting errors or future repairs.
- Check Quality and Warranty: Different brands and lines have varying warranties; some are as long as 25 years.
Sample Tool Checklist
| Tool/Material | Purpose |
| Measuring Tape | Accurately measure floor area & plank cuts |
| Pencil or Chalk | Mark guidelines & cutting lines |
| Utility Knife | Score & snap LVP planks |
| Jigsaw/Circular Saw | Cut thick planks or tackle tricky angles |
| Spacers | Maintain expansion gap around room perimeter |
| Tapping Block | Secure planks together without damaging edges |
| Pull Bar | Tighten planks near walls & obstacles |
| Underlayment | Dampens sound & can act as moisture barrier |
| Knee Pads | Protect knees during prolonged kneeling |
| Safety Goggles | Shield eyes from dust & debris |
| Extra LVP Planks | 10% surplus to account for mistakes & future use |
Having these items on hand before you start saves you from making multiple store runs and ensures you can focus on getting the floor down smoothly.IV. How Do I Prepare the Subfloor Before LVP Installation?
Clean thoroughly, fill or level any uneven areas, repair damage, and ensure the subfloor is dry to prevent issues like lifting, warping, or squeaks later on.
Proper Subfloor Preparation Steps
- Cleaning and Debris Removal
- Sweep and Vacuum: Tiny particles can create bumps or indentations beneath your LVP.
- Remove Old Staples or Nails: After removing old flooring, make sure the surface is free from leftover staples, nails, or adhesive.
- Leveling
- Check for Uneven Spots: Use a long level or a straight 2×4 to identify any dips or high points.
- Self-Leveling Compound: If there are noticeable dips, fill them with a compound made for floors. Let it cure according to the product instructions.
- Damage Repair
- Look for Cracks: Concrete floors sometimes have cracks that need patching.
- Rot or Mold: For wooden subfloors, you might need to replace damaged sections before moving forward. Mold must be fully removed and treated.
- Moisture Considerations
- Use a Moisture Meter: Especially important if your subfloor is concrete. High moisture can cause your floor to warp or develop mold.
- Moisture Barrier: In high-humidity areas, lay a barrier or use an underlayment designed to block moisture.
- Acclimation
- Planks in the Room: Leave your LVP in the room (unopened) for at least 24–48 hours so it can adjust to the temperature and humidity. This drastically reduces issues like buckling later on.
Investing time in subfloor prep may not be the most glamorous part of your project, but it’s essential. Proper preparation is like laying the foundation for a sturdy house—it guarantees your new floor will look great and stay problem-free for years.
V. How to Install Luxury Vinyl Plank Flooring Step by Step?
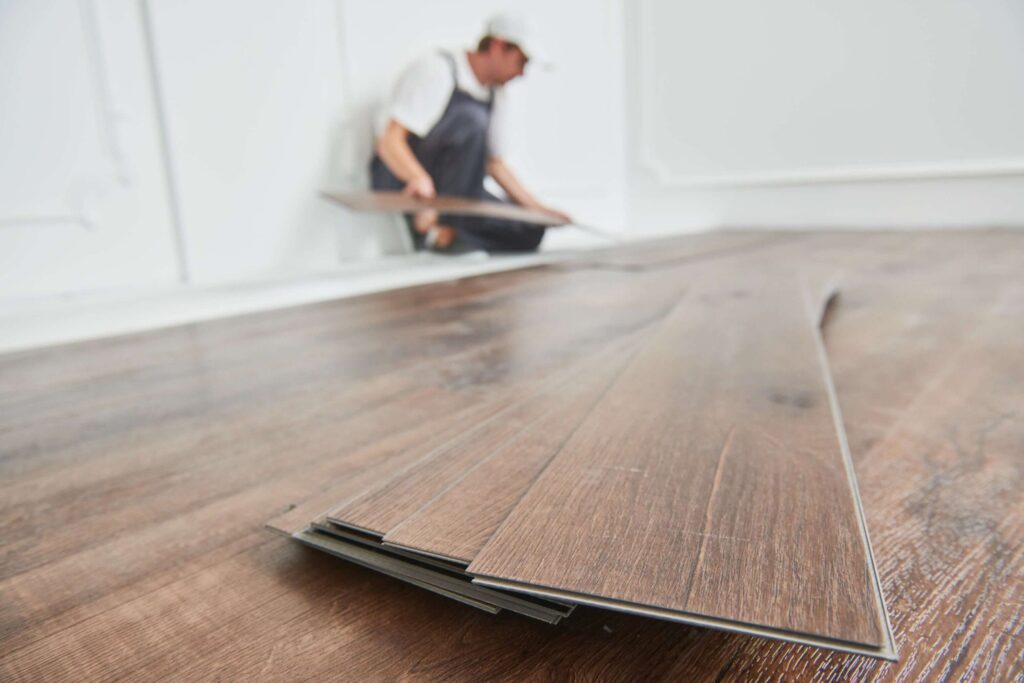
Plan your layout, maintain expansion gaps, then either click or glue your planks row by row, carefully trimming around obstacles for a neat finish.
Detailed Installation Instructions
- Plan Your Layout
- Direction of Planks: Decide if you want planks parallel to the longest wall or the main light source. Many people choose to run them in the same direction as incoming sunlight for a more unified look.
- Avoid Skinny Last Rows: Measure your room so you won’t end up with a final row that’s too narrow (less than half the plank width).
- First Row Strategy
- Use Spacers: Place 1/4-inch spacers along the wall to create the necessary expansion gap.
- Align Planks: Lock or glue the first row in place, ensuring everything is straight. Any slight misalignment in the first row magnifies as you continue.
- Click-Lock vs. Glue-Down
- Click-Lock Method:
- Insert the tongue at an angle into the groove of the previous plank.
- Gently tap with a tapping block to secure.
- This method is cleaner and typically faster for most homeowners.
- Glue-Down Method:
- Spread adhesive with a trowel, following the manufacturer’s instructions.
- Press each plank into the adhesive, taking care to align edges precisely.
- Better for areas with high traffic or commercial use.
- Click-Lock Method:
- Cutting Around Obstacles
- Measure Twice, Cut Once: Double-check your measurements around doors, vents, and cabinets.
- Score and Snap: For straight cuts, use a utility knife to score the plank and then snap it cleanly.
- Continuing the Rows
- Stagger Joints: Staggering seams (usually by about 6 to 8 inches) enhances the natural look and stability.
- Check for Gaps: After laying each row, glance back to see if all seams are tight. Gaps can collect dirt or cause structural problems.
- Final Row Adjustments
- Measure Carefully: The last row often needs to be ripped down (cut lengthwise). Maintain that 1/4-inch gap near the walls.
- Use Pull Bar: When your space is too tight for a tapping block, a pull bar helps snug planks together without damaging the wall.
Here’s a quick reference table for recommended expansions and typical row staggering:
| Installation Aspect | Recommended Measurement |
| Expansion Gap (Perimeter) | ~1/4 inch (6 mm) |
| Stagger Between Seams | ~6–8 inches (15–20 cm) |
| Preferred Plank Overlap | ~25–30% of the plank length |
| Acclimation Time | 24–48 hours (or per manufacturer advice) |
Following these guidelines ensures a professional finish that looks great and stands up to the demands of everyday life.
VI. Are There Common Mistakes to Avoid During the Installation Process?
Yes. Rushing subfloor prep, not leaving expansion gaps, or skipping plank acclimation can result in crooked planks, squeaking, or buckling over time.
Identifying and Preventing Potential Pitfalls
- Ignoring Acclimation
- Issue: Planks that haven’t adjusted to room temperature and humidity can expand or contract after installation.
- Solution: Store your unopened boxes in the installation space for a day or two before you start.
- Skipping Thorough Subfloor Checks
- Issue: Debris or uneven spots will cause lumps or squeaks down the line.
- Solution: Don’t rush subfloor prep. Spend time patching holes, leveling, and cleaning thoroughly.
- Wrong or Inconsistent Spacing
- Issue: Failing to keep a consistent perimeter gap can cause the floor to buckle or warp, especially in climates with big temperature swings.
- Solution: Use spacers faithfully around each wall and fixed object.
- Poor Cutting Techniques
- Issue: Misaligned or jagged cuts look unprofessional and waste materials.
- Solution: Take precise measurements. If you’re not confident, practice on a scrap piece first.
- Not Checking the Click-Lock Seams
- Issue: If planks aren’t properly locked in, gaps can form, allowing moisture or dirt to seep underneath.
- Solution: After installing each row, do a quick check and gently tap any uneven edges with a tapping block.
- Underestimating Waste
- Issue: Running out of planks before the project is done, forcing you to buy another batch that might have a different dye lot or texture.
- Solution: Always buy a little extra (around 10% more than your measured square footage).
Staying aware of these common pitfalls can save you time, money, and frustration. Even if you make a small mistake, most LVP installations are somewhat forgiving—you can often pop up a plank and readjust if you catch it quickly.
VII. How Do I Finish and Maintain My New LVP Floors?
Install baseboards or trim, clean away dust, and adopt simple routines—like sweeping and occasional mopping—to keep your LVP beautiful for years.
Final Touches and Ongoing Care
- Adding Baseboards or Trim
- Hide Expansion Gaps: Once you’re done, remove spacers and cover that perimeter gap with baseboards or quarter-round molding.
- Attach to Wall, Not Floor: Nail or screw the trim to the wall, so the floor remains free to expand or contract.
- Transition Strips
- Doorways and Changes in Flooring: Use T-molding or reducer strips where your LVP meets tile, carpet, or another material.
- Style and Safety: These strips ensure a level, safe transition and a polished finish.
- Initial Cleaning
- Dust and Debris: Give your freshly installed LVP a good sweep or vacuum to pick up any leftover bits.
- Damp Mop: A mild cleaner or just water usually does the trick. Avoid soaking the floor.
- Routine Maintenance
- Regular Sweeping: Removing grit and dirt prevents scratches.
- Mild Cleaners Only: Harsh chemicals or steam cleaners might damage the wear layer.
- Furniture Protection: Attach felt pads under chair and table legs to avoid scuff marks.
- Long-Term Durability
- Watch for Extreme Heat: While LVP is fairly heat-resistant, direct contact with high temperatures (like a dropped curling iron or embers from a fireplace) can cause damage.
- Sunlight Fading: Prolonged direct sunlight can sometimes lead to slight discoloration. Consider using blinds or curtains in extremely sunny rooms.
With the right finishing touches and a little bit of routine care, your LVP flooring can look fantastic for a decade or more—some even come with a 25-year residential warranty.
Conclusion: Is Luxury Vinyl Plank Flooring the Right Choice for You?
Luxury vinyl plank flooring offers a sweet spot between appearance, performance, and cost. It can handle the hustle and bustle of family life, stand up to accidental spills, and still look stylish enough to impress guests—often at a fraction of the cost of real hardwood. And best of all, it’s a project that many DIYers can tackle with confidence. By choosing quality materials, prepping your subfloor, and paying attention to each installation step, you’ll set the stage for floors that look (and feel) professionally done.
If you’re feeling inspired and want expert guidance or top-notch materials, reach out to Kinwin for a custom quote. We specialize in high-quality flooring solutions and personalized advice to ensure your DIY journey goes smoothly. Whether you’re updating a small guest room or giving your entire home a makeover, we’re here to help make it a reality. Contact us today, and let’s get your dream floor underway!